
26 Nov 2024
- 0 Comments
Making the perfect roti is both an art and a science. A central element of this delicate balance is knowing when and how to incorporate oil into your dough. Experienced cooks often have their own tried-and-true methods, but delving into the reasons behind these techniques can open up a world of possibilities for improving your results.
In this article, we will explore the intricacies of roti dough and discover why timing your oil addition is crucial for texture and flavor. You'll find yourself equipped with tips, interesting facts, and a deeper understanding of this staple food, ready to impress not just your taste buds, but those of anyone you share your meals with. Welcome to the journey of mastering roti dough!
- Understanding Roti Dough
- Benefits of Adding Oil
- When to Add Oil
- Tips for Perfect Roti
- Common Mistakes to Avoid
Understanding Roti Dough
The heart of any good roti lies in its roti dough, a simple mixture that harmoniously combines flour, water, a pinch of salt, and sometimes oil. At first glance, this assemblage may seem straightforward, yet achieving the perfect balance can be surprisingly nuanced. Typically, the flour used is whole wheat, often called 'atta,' lending the roti a slightly nutty flavor and a nutritious profile. As you begin the roti-making journey, it's crucial to appreciate how each ingredient interacts within the dough. The flour serves as the base structure, while the water activates the gluten proteins, transforming the mixture into a pliable, soft dough that’s ready to be rolled and cooked.
For those new to making roti dough, getting familiar with the unique characteristics of whole wheat flour is essential. Unlike all-purpose flour, whole wheat retains its bran and germ, meaning it absorbs water differently and requires more attention when hydrating. The goal is to achieve a balance where the dough is neither too sticky nor too dry, allowing for easy kneading. Kneading is a critical step that develops gluten networks, endowing the dough with elasticity—a must-have trait to ensure each roti can be stretched out thinly without tearing. As roti is traditionally cooked on a tava or a flat griddle, the dough must also ensure the flatbread stays soft yet firm enough to hold together during cooking.
A frequently overlooked aspect in understanding roti dough is the role of resting time. Once mixed, allowing the dough to rest boosts the elasticity and cohesion of the gluten, making it more workable. This rest period can often be as short as 10 minutes or extended to an hour if time permits, especially when aiming for fluffier rotis. Experts often stress that whether you're mixing by hand or using a stand mixer, feeling the texture of the dough in your hands is an invaluable part of the process.
"The secret to truly great roti lies in understanding your dough, and the intuition developed through countless preparations," remarked roti expert and cookbook author Anjum Anand.
In a cultural context, roti's importance cannot be overstated. As a staple in many South Asian households, learning to make it is often a cherished rite of passage. While the process may seem simple, many remember with fondness how they learned the intricacies of the dough from family members. Each roti you create is a testament to tradition, skill, and patience, bearing the mark of personal interpretation.
Attention to Quality Ingredients
Just like any other culinary endeavor, the quality of ingredients plays a defining role in the outcome. Fresh, high-quality whole wheat flour not only enhances the roti's flavor but also contributes positively to the dough's texture. If possible, sourcing freshly milled atta can transform your roti from ordinary to extraordinary. The subtle aromas imparted by fresh flour when mixed with water can already hint at the layers of flavor your roti will offer.
To summarize, understanding roti dough involves not just a mastery of the ingredients but also an appreciation of technique and tradition. As you knead, rest, and roll your dough, you participate in a culinary dance that has been carried through generations, each step grounding you more deeply in the rich tapestry of roti's history and cultural significance. Embracing the art of dough-making with an open mind can make each roti not just a meal, but a celebration of culture and skill that nourishes different generations.
Benefits of Adding Oil
Adding oil when preparing roti dough might seem like a small detail, but it has a profound impact on the texture, flavor, and overall quality of the final product. One of the primary benefits is that oil helps to create a softer dough. This is particularly beneficial for those who enjoy their rotis with a gentle, melt-in-your-mouth quality rather than a dry and chewy one. When you mix oil into the dough, it coats the flour particles, which, in turn, reduces gluten formation. Less gluten results in a softer and more tender dough. This is an especially important aspect for anyone looking to make rotis that remain supple even after cooling.
Apart from the texture, oil plays a critical role in moisture retention. By trapping the water within the dough, oil prevents the rapid loss of moisture during cooking. This is why rotis with oil added to the dough tend to stay fresh for longer periods, maintaining their softness and pliability even hours after preparation. A time-saving tip for busy cooks: A properly oiled dough can be a make-ahead marvel, with rotis staying restaurant-fresh even for another meal later in the day.
Another aspect worth considering is the flavor enhancement that comes with oil. While oil is a neutral player that doesn’t interfere with the dominant flavors of your ingredients, it can subtly elevate the richness. A splash of oil gives a deliciously satisfying mouthfeel, making the roti a delightful companion to savory dishes. Even a modest amount of oil can unlock a depth of taste that complements the spices and flavors of traditional Indian cuisine incredibly well. According to culinary experts from the Indian Institute of Food and Nutrition, 'The right balance of oil in dough brings out not just texture but also a flavor-balance that is quintessential to traditional cooking.'
‘Balancing oil ensures the traditional feel of softness in rotis, it’s not just cooking, it’s preserving heritage,’ says Professor Arun Nayar, renowned food technologist.
In some scenarios, using different types of oils can introduce unique subtleties to the roti. Olive oil can add a mild fruity essence, while sesame oil offers an intriguing nutty flavor. This is where experimentation becomes both a fun and fruitful activity. Trying out small batches with different oils can lead you to discover new family favorites, which stand out not just for their texture but their aromatic qualities as well.
On a more practical note, adding oil to roti dough helps with the handling process. It minimizes sticking to your rolling surface and hands, making the act of rolling easier and quicker, especially for those who might be new to the art of roti making. By reducing resistance, you naturally get a more even roll out, ensuring that your rotis cook uniformly, each one puffing up just right without any pesky tears.
| Type of Oil | Flavor Profile |
|---|---|
| Olive Oil | Mildly Fruity |
| Sesame Oil | Nutty |
Lastly, we shouldn’t overlook the nutritional aspect. While not typically a major source of nutrients, the inclusion of certain oils – like olive oil – can contribute keys fats that align with a heart-healthy diet. So, adding oil isn’t merely about cooking technique; it’s also about thoughtful nutrition. Embracing the simple yet impactful benefits of including oil in your roti dough can lead to tastier, healthier, and more enjoyable meals.

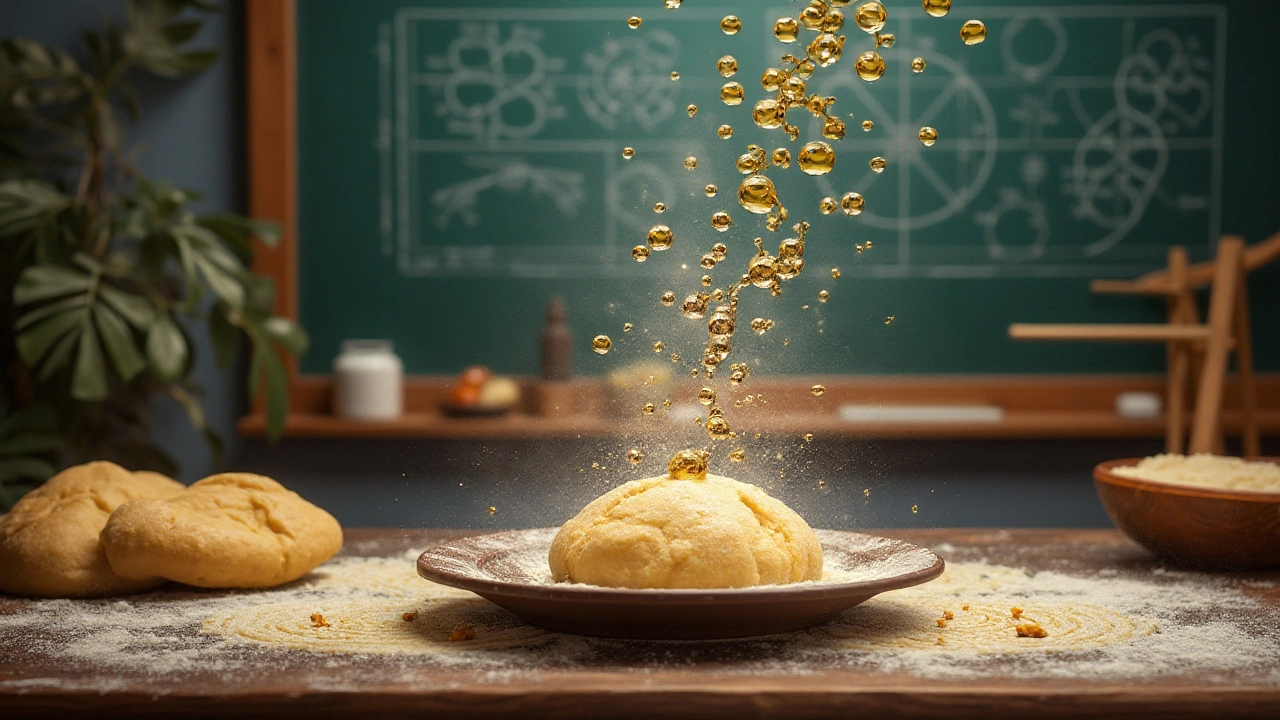
When to Add Oil
Deciding when to include oil in your roti dough is more than just a step in the cooking process; it's a pivotal moment that can shape the final product's look and feel. The timing of oil introduction into the dough not only affects its elasticity but also its moisture retention capabilities. Incorporating oil too early or late might yield a vastly different result from the intended fluffy, soft texture that many strive for. Ideally, oil should be added at the very start of the dough preparation. When you first mix flour with water, adding the oil at this stage allows it to coat the flour particles, ensuring each particle is enveloped. This creates a tender effect as the strong gluten network is often hindered slightly by the presence of fat, making your roti softer once cooked.
The precise moment of adding oil isn't just a random guess; it's grounded in culinary science. Some chefs suggest integrating oil right after measuring and sifting the flour. This method guarantees the smoothest blend, as the oil encapsulates the flour uniformly. As you knead the dough, the oil lubricates the flour surfaces, preventing excessive gluten development which can otherwise produce a chewier texture. Adding oil too late can make it challenging for the dough to absorb the fat, often causing patches that can appear uneven during cooking. Indeed, cooking is about texture in as much as taste, and an insight shared by culinary expert Chef Anita Madan captures this beautifully:
“The right time for adding oil is the difference between an airy roti and a dense one, it’s the small details that make the magic happen.”
Another compelling aspect involves the type and amount of oil used. A tablespoon of oil per cup of flour is a good starting point, adjusting based on personal preference. Olive oil, with its robust flavors, can give the roti a distinct taste, whereas a neutral oil like canola allows the natural flavors of the bread to shine. Some even explore ghee for a traditional touch, emphasizing the richness it imparts. There are also cultural interpretations to consider: in some Indian households, the lag in oil addition might be intentional to produce a slightly crispier texture, preferred in specific regions. To better understand how various methods impact the final outcome, consider experimenting with timing and oil types, each variable offering its unique take on the humble roti.
| Oil Type | Taste Profile | Texture Type |
|---|---|---|
| Olive Oil | Rich and flavorful | Soft |
| Canola Oil | Neutral | Fluffy |
| Ghee | Traditional and rich | Buttery |
Traditional versus contemporary methods might offer varying suggestions on when to add oil, blending centuries-old techniques with new-age culinary experiments. The art of roti making is a cherished practice passed down through generations, where mastering the timing of oil integration can redefine how this staple is appreciated. Whatever your approach, remember that the goal is to craft a bread that suits your palate, whether it be softer with oil added early or slightly crisp with varied techniques. Often, the richness of a homemade roti stands not just in its precise measurements but in its adaptability to cultural wisdom and genuine personal touch.
Tips for Perfect Roti
Creating the perfect roti is an art that requires patience, practice, and a few strategic tips that can make all the difference in your kitchen. When embarking on your roti-making journey, the first thing to remember is the importance of your flour choice. It is advisable to use whole wheat flour, known as atta, which is finely milled and provides the right texture and nutrition for fluffy, soft rotis. Ensuring that the flour is fresh also impacts the taste and quality of the final product significantly.
Another secret to perfect roti lies in the dough preparation. The amount of water you add is crucial and should be guided more by feel than strict measurements. A good starting ratio is two parts flour to one part water, but this can vary depending on the humidity in your kitchen and the flour's absorptive properties. Kneading is another critical step; the dough needs to be worked until it's smooth and elastic, which usually takes around 8-10 minutes. The more you knead, the better the roti's texture will be. Allow the dough to rest for at least 30 minutes, covered with a damp cloth. This resting period lets the gluten settle, resulting in perfectly pliable dough.
"The secret to great roti is in the dough preparation - the science of getting the right consistency cannot be overemphasized." - Chef Sanjeev Kapoor
When it comes to perfecting your roti dough, oil can be an essential ingredient, not only for its moisture-rich benefits but also for its ability to enhance elasticity. Add just a tablespoon of oil to your dough towards the end of the kneading process, as this can help lock in moisture while providing a sheen that contributes to the roti's softness and flexibility when cooked. Some cooks also recommend brushing a small amount of oil on top of the dough before covering it to rest, further preventing the hardening of the dough surface.
Achieving the right cooking temperature is another critical tip in making perfect roti. A pre-heated, hot tawa or griddle is imperative, as a lukewarm surface may lead to uneven cooking and dry, stiff rotis. Start by placing the rolled-out dough onto the hot tawa, waiting until small bubbles appear on the surface, and then flip. Once the other side also develops bubbles, use a pair of tongs to gently apply pressure to the edges, encouraging the roti to puff. This puffing is a clear sign that your roti is as close to perfection as possible, with evenly cooked layers trapping steam inside.
Finally, consider the role of storage and presentation in maintaining roti's perfect condition. Once cooked, rotis should be placed in an insulated container lined with a clean cloth to keep them warm and soft until serving. Overstacking can lead to steam build-up, which might make the rotis soggy. Ideally, serve them fresh out of the kitchen, complementing them with traditional accompaniments like dal, curries, or achars. Following these tips will significantly improve not only the technique but also the joy of sharing homemade rotis at the table.
Common Mistakes to Avoid
While making roti seems like a simple task, there are several pitfalls that can lead to less-than-perfect results. One of the most common errors is adding oil to the dough at the wrong stage, which can negatively impact the texture and pliability. Some home cooks mistakenly add oil before the flour has mixed thoroughly with water, leading to uneven hydration of the dough. This can result in dry patches that make the roti difficult to roll out evenly.
Another frequent mistake is using too much oil in the dough. While oil is crucial for softness and flavor, an excess can create a greasy texture that is undesirable. Rather than adding oil haphazardly, it's important to measure it carefully. Generally, a tablespoon or two per cup of flour is sufficient. This keeps the dough moist while maintaining the right balance for elasticity, essential for the *roti dough* to roll out smoothly.
Overworking the dough is an issue many don't recognize. Kneading might seem like an endless task, but doing so too aggressively or for too long can develop too much gluten, making the roti tough rather than tender. Aim to knead just enough to bring the dough together until it's smooth and elastic but not overtaxed. This balance is key for achieving the ideal texture.
A famous Indian chef once said, "The dough should feel like the soft lobe of your ear." This simple test captures the essence of what a perfect roti dough should feel like once you're done kneading.
When uncertain, some cooks might reach for alternative flours, assuming they are interchangeable. This is a mistake particularly if you're aiming for authentic results. While experimenting with different flours like millet or quinoa is encouraged for flavor and nutritional value, they behave differently due to varying gluten content and water absorption rates. Experiments are best done in small batches until you unlock their secrets.
Let's not overlook cooking temperature as a pivotal factor. Many think that high heat is always best for cooking *roti*, but this isn't always the case. Using a medium-high flame is recommended to ensure the *roti* cooks evenly, allowing it to puff up nicely without burning. Controlling the flame requires a bit of practice to perfect, so patience is advised while familiarizing yourself with your stovetop's quirks.
Avoiding these common mistakes can help you on your journey to creating soft, delicious rotis every time. Understanding the nuances of each step, from mixing the *roti dough* correctly to managing heat effectively, can transform your cooking experience and the quality of your rotis immensely. Embrace the process and allow your skills to grow with every batch.