8 Sep 2025
- 0 Comments
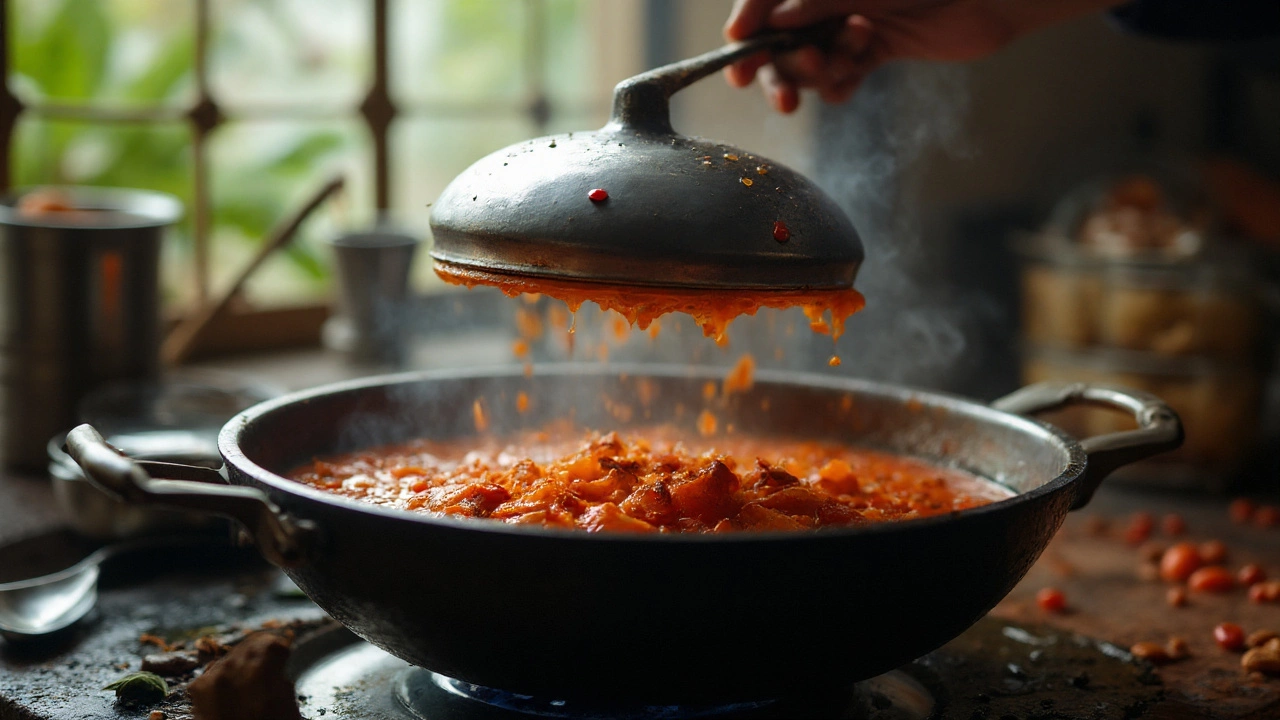
Wondering if the lid should stay on or off when you cook chutney? That small choice decides everything-texture, flavour, and even whether your kitchen ends up dotted in tomato. Here’s the straight answer: lids control moisture. If you want a thick, glossy chutney, you need evaporation. If you want gentle softening or less mess, a lid helps-but use it sparingly.
I cook chutney a lot at home in Sydney. Weeknights move fast, Ivy is always “taste-testing,” and I don’t have time for watery results. These are the rules I trust, plus the food-safety notes I follow in Australia. You’ll get clear, practical answers with no fuss.
TL;DR: The quick answer
- Cooked chutneys (tomato, onion, apple, mango): keep the lid off for most of the simmer so moisture evaporates and the chutney thickens. Cover only briefly to control splatter.
- Raw/herb chutneys (coriander-mint, coconut): no long cooking at all. Blend raw and, if using tempering, pour the hot oil over-no lid needed.
- Pressure cooker/Instant Pot: use lid on to soften fruit/onion quickly, then use sauté mode lid off to reduce to final texture.
- How thick is “done”? It should mound on a spoon and leave a clean track when you drag a spatula across the pan. For jarred sweet fruit chutneys, you can use the “jam set” cue: ~105°C or the cold-plate wrinkle test.
- Food safety: for pantry-stable canning, keep pH below 4.6 with enough vinegar and sugar, and follow tested canning methods (see National Center for Home Food Preservation; NSW Food Authority). For everyday fresh chutney, cool fast and refrigerate.
Short version: lid off to thicken, lid on only to soften or guard against splatter. That’s the core of chutney lid on or off.
Step-by-step: The master method (and when to use a lid)
Use this flow for any cooked chutney-tomato, onion, apple, or mango. It gets you to that jammy, spoon-coating finish without guesswork.
- Pick the right pan: Choose a wide, heavy pan (stainless or enameled). Wider surface = faster evaporation = thicker chutney in less time.
- Start with aromatics: Heat oil on medium. Add whole spices (mustard seeds, cumin, fenugreek), ginger, garlic, and chillies. Sizzle 30-60 seconds. No lid.
- Soften the base: Add onions (if using). Sprinkle salt to draw out moisture. Stir 2-3 minutes. If you’re short on time and want quicker softening, you can cover for 3-5 minutes on low. Then remove the lid. You’ve added moisture; now you need to drive it off.
- Add main produce: Stir in tomatoes, mango, apple, tamarind pulp-whatever the recipe calls for. Keep it uncovered now. The goal is a lively simmer, not a rolling boil.
- Season and sweeten: Add spices, vinegar, and sugar. Sugar boosts gloss and helps the set; vinegar drops pH for freshness and safety.
- Reduce, reduce, reduce (lid off): Keep the pan uncovered. Stir every 3-5 minutes at first; more often as it thickens. If it spits, tilt a lid slightly or use a splatter guard so steam can still escape.
- Watch for texture cues: Drag a spatula across the pan. If the base stays clean for a second before the chutney closes back in, you’re close. It should mound on a spoon and slide slowly.
- Final balance: Taste. Add a splash of vinegar for brightness, a pinch of salt to lift flavour, or a spoon of sugar to round sharp edges. Tiny adjustments make the finish taste “set.”
- Cool fast: Spread in a shallow tray to cool quickly. This keeps colour bright and texture consistent.
When can a lid help? Two moments only: short bursts to soften onions or fruit on low heat, and partial coverage to tame splatter. In both cases, keep steam pathways open or you’ll trap water and stretch your cook time.
Real-world examples: Four chutneys, four lid strategies
Here’s how this plays out with actual chutneys you probably make at home.
1) Tomato-Onion Chutney (South Indian style)
- Use-case: Dosa, idli, uttapam, grilled cheese.
- Method: Sauté mustard seeds, urad dal, dried chillies in oil; add onions, then tomatoes; season with salt, chilli, and a tiny pinch of jaggery. Blend smooth or keep chunky.
- Lid rule: Mostly lid off. Cover 3-5 minutes on low only if you want faster softening at the start, then uncover to reduce. You want that tangy, spoon-coating body.
- Time guide: 18-25 minutes total on the stove; reduce to ~⅔ of original volume for a thick finish.
- Pro tip: A small splash of vinegar at the end keeps the colour bright and adds lift without making it sour.
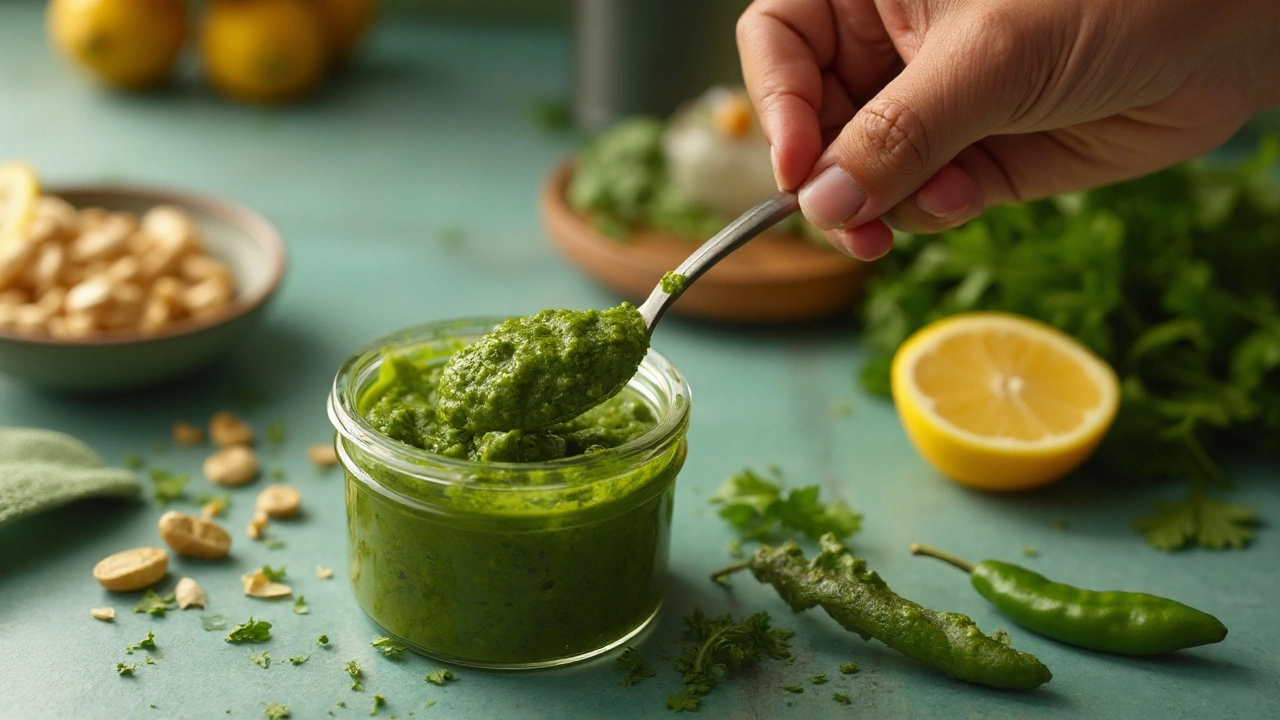
2) Coriander-Mint (Green) Chutney
- Use-case: Chaat, kebabs, sandwiches, samosas.
- Method: Blend coriander, mint, green chilli, ginger, lemon or lime juice, salt, a touch of sugar. Optional: yogurt for creaminess or water for consistency.
- Lid rule: No cooking, so no lid. If you temper mustard seeds and curry leaves in hot oil, pour over at the end-don’t cover.
- Time guide: 5-7 minutes total.
- Pro tip: Add acidity (lemon or vinegar) and a couple of ice cubes while blending to keep the green vibrant.
3) Coconut Chutney
- Use-case: Idli, dosa, vada, upma.
- Method: Blend fresh or frozen grated coconut with roasted chana dal (dalia), green chilli, ginger, salt, and water. Temper mustard seeds, urad dal, and curry leaves in hot oil, then pour over.
- Lid rule: No cooking of the chutney itself. No lid. After tempering, avoid covering-the steam can make it watery and dull.
- Time guide: 8-10 minutes total.
- Pro tip: Use very cold water for blending; it tightens the texture and helps prevent splitting.
4) Sweet-Sour Mango (or Apple) Chutney
- Use-case: Cheese boards, curries, roast meats, sandwiches.
- Method: Cook fruit with onion, spices (cumin, mustard, nigella, chilli), sugar, and vinegar until jammy.
- Lid rule: Uncovered for most of the simmer to concentrate. If your stove spits wildly, use a splatter guard or offset the lid so steam escapes freely.
- Time guide: 35-60 minutes, depending on batch size and pan width.
- Set cues: It should sheet off the spoon, and a chilled plate should show wrinkles when you nudge the chutney with a finger.
I’ve tested these patterns on gas and induction stoves here in Sydney. Humid summer days mean slower evaporation; I go wider with the pan or switch on the rangehood to keep reduction steady.
Cheat sheets, tools, and the lid decision table
Here’s a quick reference you can pin to your fridge. It tells you when to cover, when not to, and how to spot doneness fast.
| Chutney type | Cooking? | Lid position | Why | Key cues | Typical time |
|---|---|---|---|---|---|
| Tomato-Onion | Cooked | Off (partial only for splatter) | Needs evaporation to thicken | Mounds on spoon; spatula leaves track | 18-25 min |
| Green Coriander-Mint | Raw | No lid | Blended fresh; no simmering | Bright green; smooth but pourable | 5-7 min |
| Coconut | Raw + tempering | No lid | Steam dulls colour and thins texture | Thick, scoopable; glossy from tempering | 8-10 min |
| Sweet Mango/Apple | Cooked, jammy | Off (partial for splatter) | Concentration gives body and shine | Sheets off spoon; plate wrinkle test | 35-60 min |
| Tamarind-Date | Cooked briefly | Mostly off | Reduce to syrupy pour | Thick ribbon when drizzled | 12-20 min |
| Pressure Cooker Batch | Cook + reduce | On to soften, off to finish | Speed + control over final texture | After sauté mode, spatula track holds | 10-15 min soften + 10-20 min reduce |
Rule-of-thumb heuristics
- If you want thicker, go wider and keep the lid off.
- If your chutney spits, use a splatter guard or offset the lid 1-2 cm to vent steam.
- If it tastes flat at the end, add acid (vinegar/lemon), not more salt.
- Stir more often as you approach the finish; sugar can catch fast.
- For a glossy finish on fruit chutneys, add sugar gradually after fruit softens.
Quick checklists
Avoid watery chutney:
- Use a wide pan, not a tall pot.
- Keep heat at a steady simmer, not a covered boil.
- Resist covering unless splatter is wild-and even then, leave a vent.
- Reduce to the spatula-track cue before turning off heat.
Prevent burning near the end:
- Lower heat slightly once thickening starts.
- Stir the base and corners of the pan every minute or two.
- Add a splash of water if it’s catching, then cook off again lid off.
Manage splatter without losing reduction:
- Use a mesh splatter screen.
- Offset the lid so steam can escape freely.
- Reduce the simmer to calm bubbles, then slowly bring it back up.
Food-safety notes I actually follow
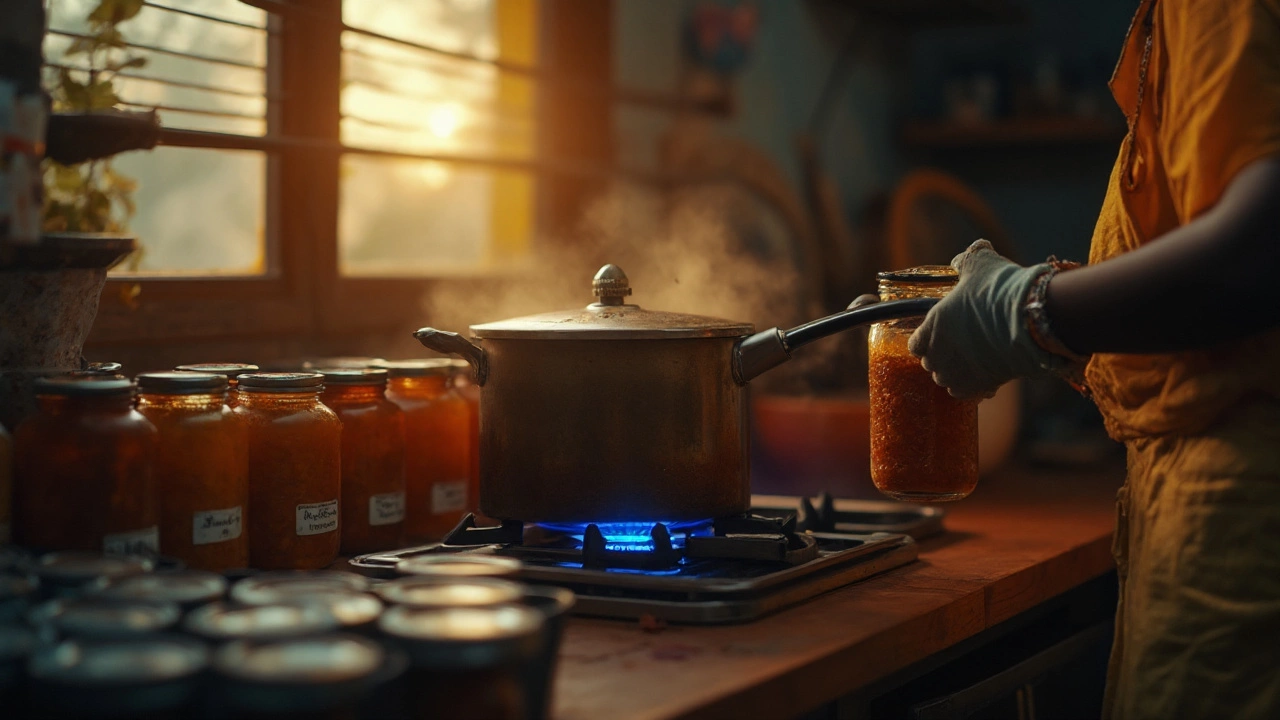
- Pantry storage: Only for properly acidified, tested recipes, processed in a water-bath canner. Keep pH below 4.6. Refer to the National Center for Home Food Preservation (USDA) and NSW Food Authority for current guidance.
- Fridge storage: Fresh chutneys (tomato-onion, coconut, green) live in the fridge. Cool fast, store in clean jars, and aim to use within 3-7 days depending on type.
- Freezer: Fruit chutneys freeze well for 3-4 months. Leave headspace in jars.
FAQ, fixes, and next steps
Why did my chutney turn watery?
You probably kept the lid on or used a pot that was too narrow. Uncover and simmer until a spatula leaves a track. If you’re in a rush, split it into two pans to double evaporation.
Can I cover to “speed things up”?
Covering softens faster but slows reduction. If you cover early to soften onions or fruit, set a timer (3-5 minutes), then uncover and reduce properly.
Will a lid dull flavour?
Long covered cooking can mute fresh notes and trap steam that condenses back into the pot. That makes flavours taste diluted. Keep it uncovered once you’re past the softening stage, then brighten at the end with acid.
How do I keep herb chutney green?
Use cold ingredients, blend with lemon or vinegar, and don’t cook it. Store covered in the fridge with a thin film of oil on top or a tight lid to limit oxidation.
Is cornflour or starch okay to thicken chutney?
I don’t recommend it. Starch gives a dull, gloopy finish and can weep later. Evaporation builds body and flavour naturally. If you must rescue a batch, use the bare minimum and understand texture will change.
What about pectin?
Fruit chutneys can benefit from natural pectin. Apples have plenty; mango has less. If you want a firmer set, add a chopped tart apple or a little pectin, then cook uncovered until you hit the set cues.
How do I know a fruit chutney is “set”?
- Temperature: around 105°C at sea level (jam set point).
- Cold-plate test: a spoon of chutney wrinkles when pushed after 1 minute in the freezer.
- Visuals: it sheets off the spoon and sits in soft mounds.
Can I do chutney in a pressure cooker?
Yes. Pressure-cook 2-3 whistles (or ~5-8 minutes on high pressure) to soften, then switch to sauté mode with the lid off and reduce until thick. Taste and balance at the end.
What’s the safest way to can chutney?
Use a tested recipe that keeps pH below 4.6 and follow water-bath canning steps. The National Center for Home Food Preservation (USDA) has reliable directions. In Australia, check NSW Food Authority and CSIRO for current advice. If you’re not canning, just refrigerate.
My chutney is too sour. How do I fix it?
Add a teaspoon of sugar at a time and a pinch of salt. Let it cook uncovered for a minute, taste again, and stop the moment it feels balanced.
My chutney is too sweet.
Add a splash of vinegar or a squeeze of lemon. Simmer uncovered 2-3 minutes and taste again.
It’s thick but tastes raw.
Give it a few more minutes at a gentle simmer, uncovered. Raw spice notes mellow with time and evaporation.
Instant mess: tomato everywhere. Help!
Turn the heat down, use a splatter screen, or rest the lid askew. Don’t fully seal the lid or you’ll reverse the evaporation you need.
Next steps for different cooks
- Beginner: Start with tomato-onion chutney. Keep the pan wide, the lid off, and aim for the spatula-track cue. It teaches you everything about reduction.
- Busy parent (me most nights): Pressure-cook to soften, then reduce lid off on sauté. You’ll halve the time and still get great texture.
- Batch cookers: Go very wide or use two pans side-by-side. Big pots with narrow tops are the number one cause of watery chutney.
- Minimal equipment: A nonstick sauté pan works; just stir gently and avoid metal utensils. A mesh splatter guard is worth the drawer space.
- Blender-only nights: Make green chutney or coconut chutney-no cooking, no lid, instant win.
A few small, hard-won tips from my kitchen
- Salt early to draw out moisture; reduce uncovered so flavour concentrates instead of stewing.
- Keep vinegar near the stove. A teaspoon at the end can turn a decent chutney into a bright, balanced one.
- If humidity is high (hello, Sydney summers), accept longer reduction times or widen your pan. Don’t crank heat so high that sugar burns.
- Cool fast in a shallow tray before jarring. This locks in texture and prevents condensation from thinning the chutney in the jar.
If you remember nothing else: chutney gets thick when steam can escape. Keep it uncovered for the reduction phase, use partial coverage only to tame splatter, and trust your eyes-the spatula track never lies.